By Mark Bolender
Although it’s tempting to just get on and go, every horse and rider needs to start at square one to be sure all the necessities for safety and success are in order. Before I even think about tackling obstacles on horseback, I get my horse solid and steady from the ground, and I let him think through those obstacles on his own. To do that, I start with groundwork. Whether the horse is twenty or two, that’s where I start.

Create a Bubble
To be a willing partner, the horse must understand that I am not there for fun and games, this is a learning experience. I like to take a page out of the herd dynamics book, where there’s a distinct pecking order. The clear leader in every herd is the alpha mare. Say your horse is in a herd and he does something undesirable, such as nipping or walking into the alpha mare. What would that alpha mare do? She would instantly kick or bite. Horses have never heard of a three-second rule. This is the response we want to mimic.
Working in a rope halter, if the horse walks into me or nips or bumps me, I use the end of the lead rope to slap the horse on the shoulder. This isn’t something that hurts the horse, and it’s certainly much softer than a kick or a bite from an alpha mare, but it gets the point across. If I want to test a horse’s respect, I’ll walk into the horse. In turn, if the horse does not respect my bubble by backing away, I will slap the horse on the shoulder with the lead rope. Doing so ensures that when I ask for a response, I get one. What I want the end result to be is when I move, the horse moves with me. If I request the horse to consider something, he’ll consider it.

Who’s in Control?
Before I head out to work obstacles, I want to make sure I have control of every body part from the ground. I will ask the horse to move his shoulders, hips and ribcage from both sides, and I’ll ask him to move his whole body laterally.
To start, walk to the horse’s hip. If you’ve already established yourself as the alpha, the horse should yield to your request. Should the horse refuse to move his hips, I’ll wave the end of the lead rope, driving the horse around, and I might even give him a slap with the lead rope to that area. A slap should never be delivered with malicious, but just as a firm follow-up to the initial request. I apply these same principles to the ribcage and shoulders, finishing up with asking the horse to move his body away laterally.
When I start my colts, I emphasis the “bubble” and body control. I also drive them with long lines. The same principles can always be applied to older horses. My goal with long lines is to teach a horse to drive and guide. Without drive, it’s very difficult to ask a horse from the ground to pick its way through obstacles. If you don’t have experience with long lines, seek help from a professional, especially with a young horse.
Lunging and round-pen work also teaches a horse to drive. I’ll even lunge the horse up and down hills, which teaches him how to pick up his feet and navigate uneven ground. The key lesson, whether it’s taught with long lines, lunging or in the round pen, is that when you move toward the horse’s hip to ask him to go forward, he reacts. The exercises I use for emphasizing body control are the building blocks for creating drive.

Let the Horse Think
Once I’ve built a foundation with the horse through leadership and body control, now it’s time for the fun stuff.
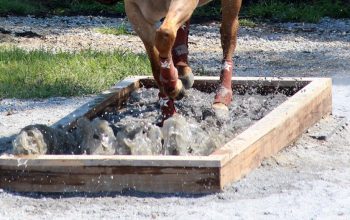
I like to start all horses with the “junkyard,” where they have to pick their way through a patch of boulders or rocks and over logs. If you don’t have a set-up like this at your disposal, I’ve found that upturned black, plastic flower pots work extremely well in place of rocks.
Using a rope halter with a long lead rope, I’ll walk the horse to the edge of the obstacle and drive him to walk over it. I let the horse work through the obstacle in his time and I’ll walk beside him, driving, at the edge of the obstacle. By letting the horse figure out how to navigate the obstacle on his own, it teaches him to think. The less I do for the horse, the more he learns to do for himself. Once he gets it, you’ll see his confidence explode.
After the horse has been introduced to each obstacle, I’ll work through all the obstacles every day. If the horse is a little better than the day before, I move on to the next obstacle, and we work through our repertoire. I do not try to create perfection in a day. Overworking an obstacle becomes mind-numbing, which is the opposite of what I want to see in the horse. While I’m working with the horse, I look for ease in the horse’s maneuvering, for him to become more accepting and bolder, with more confidence and more finesse.
Knocking over an obstacle or kicking a log isn’t necessarily a bad thing. A horse can learn a lot by hitting an obstacle, and that’s why I want all of my obstacles to have the ability to roll. After he has knocked over a log or a pot a time or two, a horse will figure out how to avoid the error. Pretty soon, he’ll be able to walk through in a dignified manner.
By working through obstacles that move, the horse learns that every action has a reaction. Flighty horses fare particularly well in this type of training because they are taught to think things through. Where wrecks come in, be it on the trail or at a show, is when the horse panics and then the rider panics. A horse that knows how to think instead of panic is a valuable asset.

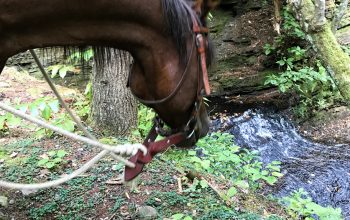
Not all horses accept every obstacle they face. A horse that refuses an obstacle, more often than not, had a bad experience before and his response is to avoid the situation. In some cases, the horse can become dangerous to himself and others. If I run into an avoidance issue like this, I go back to my leadership and body control exercises, reminding the horse that I am the leader and worthy of trust. When I come back to the obstacle, for instance water, I want the horse to at least consider the water. Once the horse gets to that point, I let him take all the time he needs, and I never push him to step in. It’s a game of patience. Given all the time he needs to consider it, the horse will never jump into the water, he’ll walk right in if you’ve addressed the avoidance issue first.
When teaching a horse, my attitude is never, “You’re going to do this.” The correct attitude for working with a willing partner is, “This is what you can do.”
Pony Up
Horses can be great mentors, that’s why I turn to ponying a less experienced horse, say a colt, with a more wizened mount. Now, ponying can turn dangerous. There are plenty of positions to get in that can turn bad when you’re working with two animals, instead of one. Before attempting to pony for the first time, riders should seek help from a professional. There is no harm in asking for help, especially with advanced training techniques like ponying. After all, safety is the number one goal.
 When I pony, I always use a good pony horse, one that won’t tolerate any theatrics from the horse being ponied, but also one that will reassure the less-experienced horse. For me, a pony horse has to be willing to take a hit but have enough presence to say, “Get out of my space.”
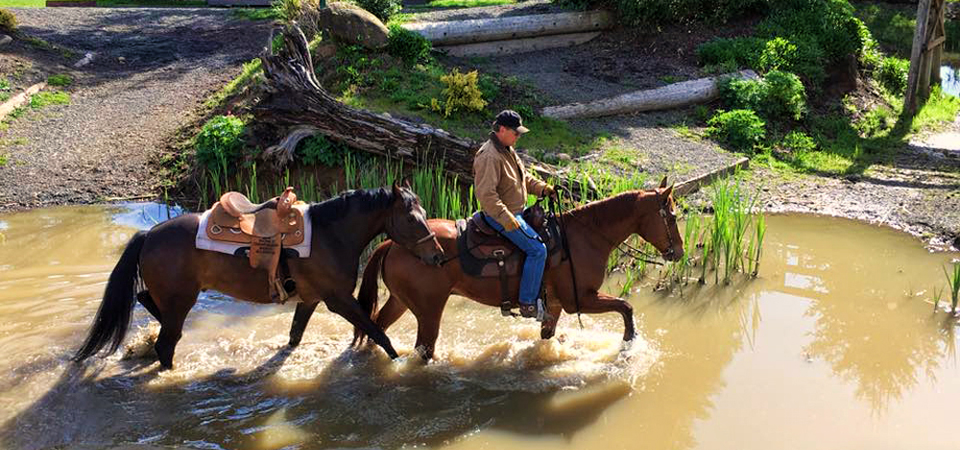
Once I’ve established basic ponying ground rules, the ponied horse respects the pony horse, understands how to guide, stop and go from a ponying position. Then I move to the obstacles. We’ll traverse logs, bridges, up and down hills, in and out of ponds. For obstacles that are particularly scary to the average inexperienced horse, like water and steep hills, a mentor to follow bolsters his confidence.
Using a pony horse is also a great way to teach an inexperienced horse the pace that is acceptable not only for competing in Trail Challenges, but also for safety. For instance, I don’t want a horse to leap down a hill, or up one, or into water. A good pony horse will set the pace, clear the obstacle and wait. I’ll position my pony horse so the horse being ponied is forced to take smaller steps as it approaches the obstacle, lest it runs into the pony horse.
What I like most about ponying, in addition to the confidence building, is that inexperienced horses learn the correct pace for every obstacle. Before I ever get on him, the horse knows his pace and I know I won’t have to pull on his mouth to keep him from rushing through an obstacle.
Ponying Safety
Here are a few tips to keep in mind:
- Coil your lead rope. You can let go of a coiled rope easily or dally, if need be.
- Dallying. Always keep your thumbs up.
- Switching sides. You can pony your horse off either side, but never let the horse switch sides unless you tell him to.
- Position is everything. Before you even think about approaching an obstacle with a ponied horse, be sure that your pony horse is comfortable with the ponied horse being in a bad position. Should things get hairy, your pony horse will have the rope all over him. Don’t attempt ponying if you or the pony horse can’t handle the worst-case scenario.
The Ground Rules
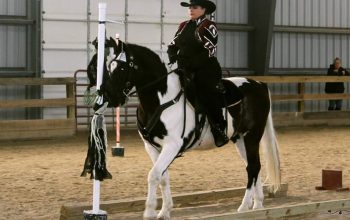
When you are training for an IMTCA Trail Challenge or any trail obstacles you are trying to epitomize the perfect trail horse and prepare him for virtually anything, be it in the arena, in an urban area or out in the wilderness. Remember, setting the ground rules for your relationship is crucial before you get on the horse’s back and ask him to try foreign obstacles.
Happy Trails and Bolender Blessings,
Mark
For more information about the International Mountain Trail Challenge Association please visit:
www.imtca.org
This article originally published in the April issue of Sport and Trail Magazine